NOTE: The kits have sold out, but feel free to attend the session and learn how to make the staircase from your own materials! A materials list is given further down on this page.
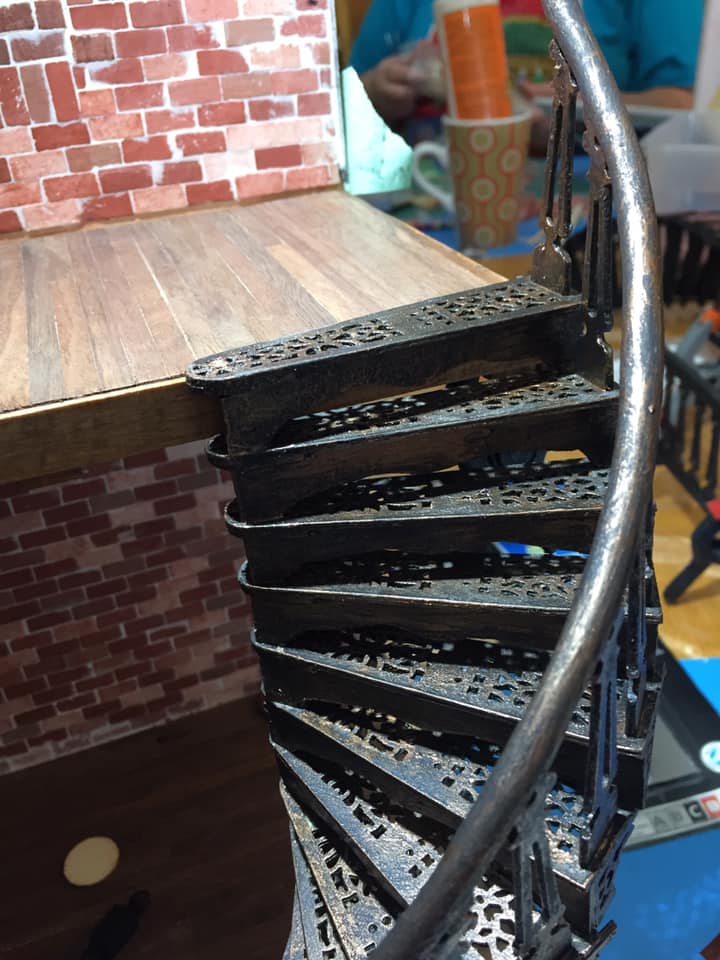
Join Wanda Waterfield as she shows you how to make this spiral staircase from two wooden fans. There are three Create Shares sessions coming up to create this project on April 14, 21 and 28 at 2 p.m. Eastern time. Each session will last 60-90 minutes. You can find the details on those, including the links, through the Create Shares page.
We will be building the staircase in 1” scale, but for those who love ½” scale Wanda will share how you can take the components and make some adaptations to change it to a ½” scale staircase as well.
As a fundraiser for NAME's Create site, we're offering a kit for the parts for the staircase. (We will also be using decorative toothpicks for the spindles and not the balusters shown in some of the pictures). These three sessions will focus on JUST the staircase, not the room to put it in. We are also providing a materials list if you want to provide you own supplies.
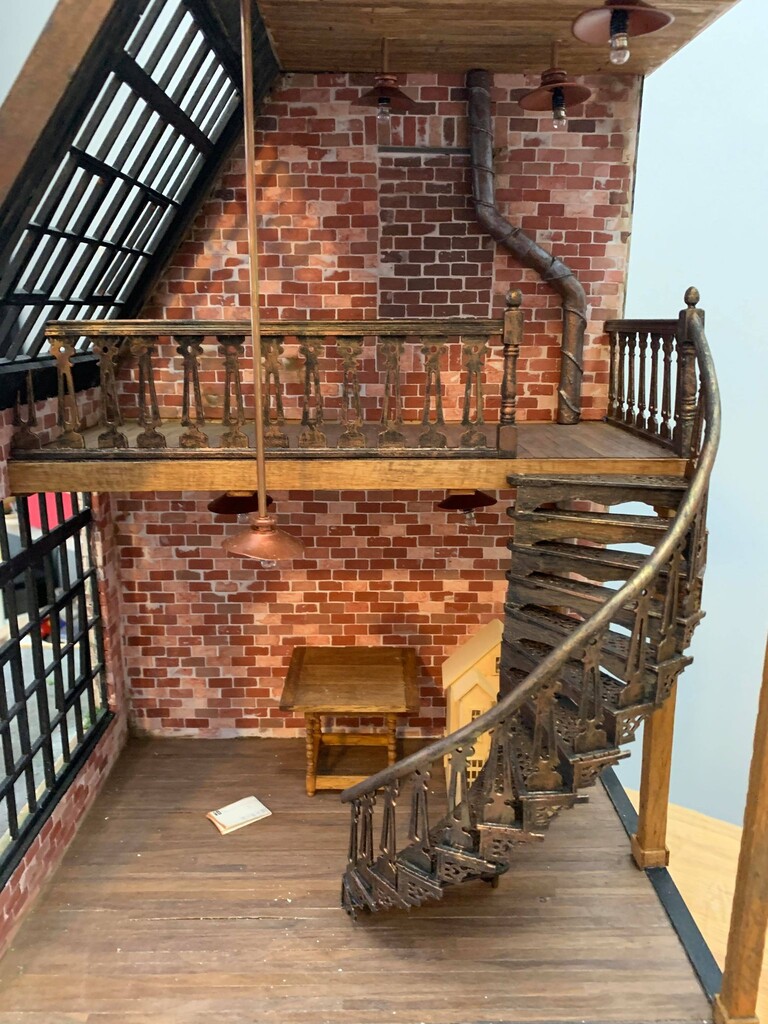
You can put the staircase in a room of your choice or even display it by itself in a dome.
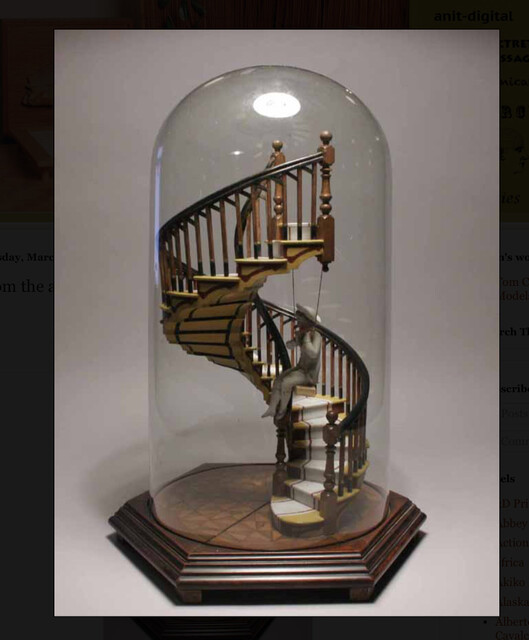
NOTE: This picture is for INSPIRATION ONLY.
Here are the complete written instructions. It's long. We don't recommend printing it!
Focus will be on making individual steps for the staircase and will cover the following:
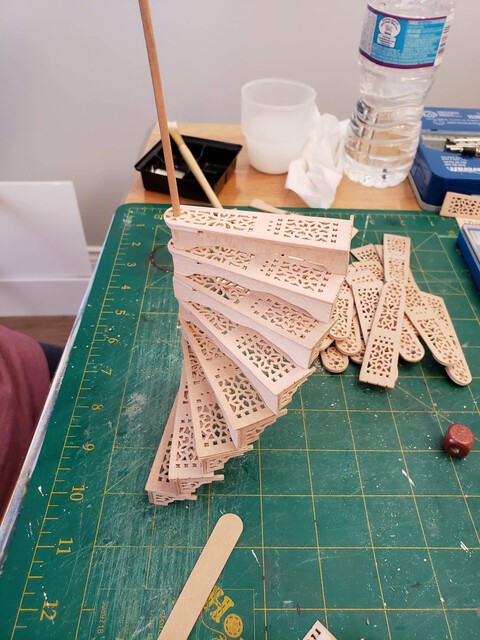
a. Includes cutting the risers
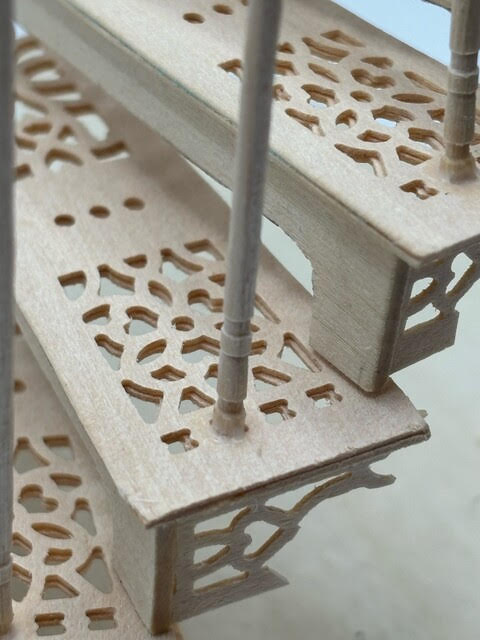
b. Disassembling the fan and cutting the sections for the tread and the stringer detail
c. Gluing the treads together and adding the round disc
d. Drilling the holes for the spindles and center post
e. Gluing the center post into the round base
f. Cutting and adding the tooth pick spindles
g. Discussion on how many steps are needed and how to adjust the riser height to fit your project
People will not finish all steps in this session, but as long as they complete a step or two, their homework will be to complete all the necessary number of steps before the next session.
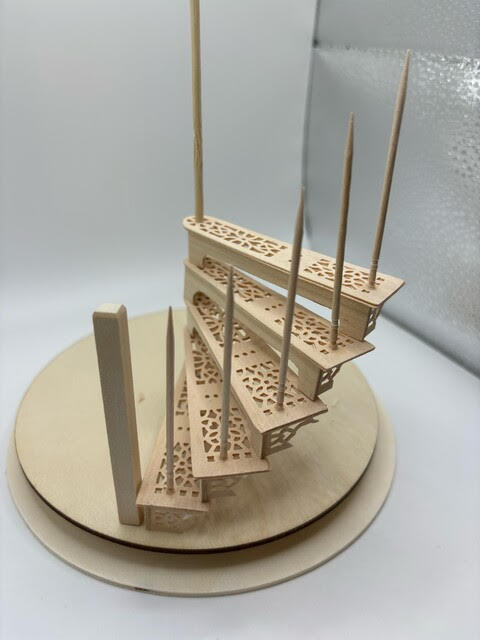
Focus will be on assembling the staircase and railing and will cover the following:
a. Adding the individual step components on the center post
b. Adding the railing
c. Add the newel posts or shape the tubing to end the stair railing (using heat to mold the plastic)
d. Add thick layers of glue to all the wood components (can be moved to 3rd session if time is needed or can be homework to be done before next session)
e. Paint the handrail with Mod Podge or primer (can be moved to 3rd session if time is needed or can be homework to be done before next session)
Focus will be on painting the staircase and will cover the following:
a. Apply black paint
b. Sponge on gold/rust paint using the sponge pieces
c. Sponge on metallic paints using the sponge pieces
d. Apply top coat of matte clear coat
Techniques:
• Scratch building
• Faux finishing
Tools / Supplies Needed
• Elmer’s Glue (Not Student Glue) or Gorilla Wood Glue
• Paints: Flat black, gold, metallic bronze, metallic gold
• Mod Podge or other primer
• Matte finish top coat
• Paint brushes
• Dremel with Drill bit or Pen Vise with 1/8” or 3/16” drill bit
• Small wood clamps or alligator clips or clothes pins
• Utility knife with spare blades.
• Small 90 degree square, or something that can be used as a square.
• Sandpaper.
• 1/4" dowel piece to wrap the sandpaper around.
FINISHED DIMENSIONS: 6.5” diameter by 11” high (Height can vary depending on number of steps added)
SKILL LEVEL: Beginner to intermediate
Here is a document that you'll want to download. It includes the kit contents (in case you need/want to try to put together your own materials), the supplies needed (so you can easily print out the list) and a template that you'll need to build the staircase.
Out of fairness to our kit creators who have to purchase materials ahead of time, and since all sessions are recorded and may be viewed at a later time, we will not accept cancelations for this fundraiser.