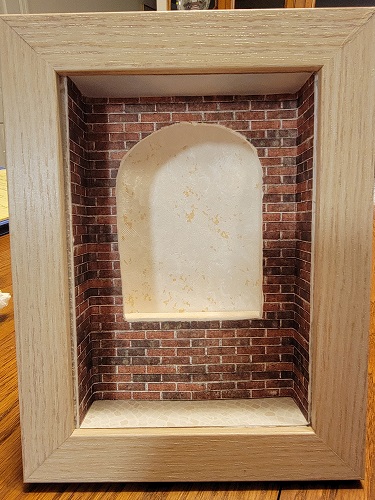
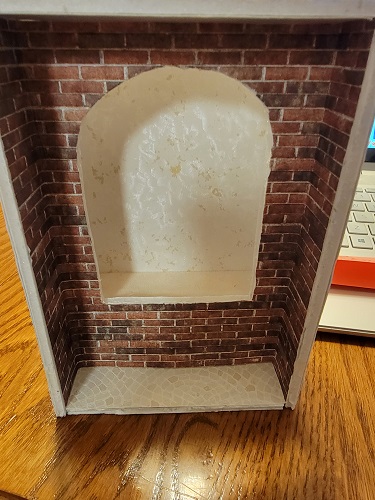
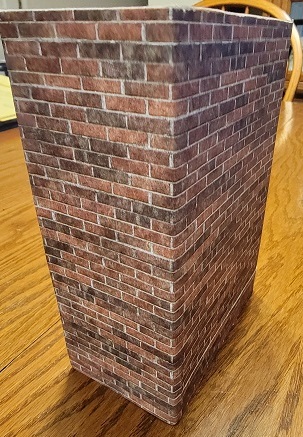
 Here are some pictures of the prototype for the Window Vignette Lunch & Learn that Debbie Colombo is going to teach on September 10, 2022. You are, of course, able to finish it anyway you want and we can't wait to see what you do with it. Remember to send your pictures to Debbie Colombo (irvfink@gmail.com) so they can be put in the Create Photo Gallery.
Materials needed:
-
outside wallpaper (I used brick I found online). I also used the brick wallpaper on the wall outside of the window wall as well as the two side walls.
-
one sheet of 3/16" foam core
-
inside wallpaper - you will need some for the inside of the window in the shop
-
You need some sort of floor paper that looks like it could be stones, or some other sort of outside ground. I used a scrap of an old wallpaper I had. (I knew I kept those scraps for something!)
-
You don't need this, but just so you know, I used a scrap of wallpaper I had that looked like clouds on the ceiling outside of the store window.
-
I used a scrap piece of carpet in this box on the shelf. You may want to do some other finish.
-
a sturdy 5"x7" frame
-
straight pins with heads
-
an exacto knife
-
a utility knife
-
a cork backed ruler
-
a pencil
-
tacky glue
-
wallpaper paste
-
a glass or a cup with a diameter as close to 3" as you can get.
-
You will also need to decide if you want to light inside your window with a bulb (which you will have to do on your own), or if you want to cut a hole in the top like I did. It really lets in a sufficient amount of light.
Cut the following from 3/16" foam core: (I suggest labeling your pieces)
-
Back: 4-9/16" wide by 7" high
-
Sides (2): 2-3/4" wide by 7" high
-
Top and bottom same size: 2-1/2" wide by 4-9/16" long
-
Arch Piece: 4-9/16" wide by 6-9/16" high
-
Shelf braces (4): 1/2" wide by 1-3/8" high
-
Shelf: 1-1/4" wide by 4-9/16" long
-
Arch braces (4): 1/4" wide by 3/4" long
Now I know that there will be those of you that will want to start your box prior to this event. That will be great. I suggest that when you glue it together, you use the pins to hold it together until it dries. This is much easier than with a clamp. The sides go alongside the back wall. I also would not suggest gluing in the arch wall until we are all together. I think explaining the cutting of this piece is better done in person. If you do start pre-building the box, don't worry, the paper will cover all the gaps. 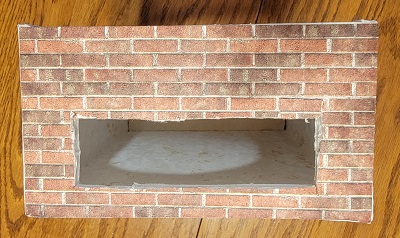
Also, if you decide to light your box, go ahead and glue your top in. If you are going to make the little "window" in the top, these are the dimensions. Measure in 1/4 inch from the back wall, center, and cut an opening that is 1-1/4" high by 3-1/2" wide.
When it was done originally for the 2002 National Convention, the room featured paper dolls. Here is that tutorial. If you are interested in buying paper dolls for the scene, this is the link. The dolls might have to be sized for the scene.
--- Debbie Colombo