The Challenge for April 2022 is showing us something that is easier now with technology.
Here are the amazing submissions.
_____________________________________
From Pam Doran:
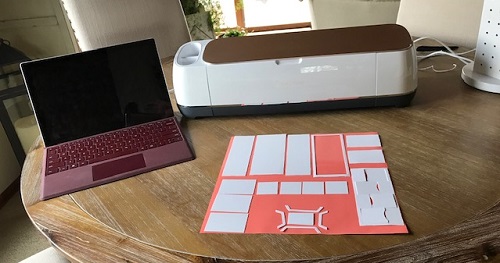
The April Challenge – "What is easier to make now because of technology?" – made me want to say “Everything”. Using my Cricut and the computer, I can now design a piece of furniture, cut it out and have all the pieces fit together. I can cut right angles (for some reason that is so hard for me to do with scissors) and have multiples of the same shape and have them all match. I started looking at and buying miniatures in the early 1980’s, but was always afraid to make something from scratch myself. That fear has lessened. I go to my local library and utilize their makerspace for 3D printing. I can’t sculpt, so technology, again, has come to my rescue. Lastly, technology has made it easier to make new friends, learn, and expand the world of miniatures. Online House Parties, Zoom meetings, create.miniatures.org, TikTok, Instagram, and YouTube all reach individuals throughout the world, teaching us new skills, keeping the miniature community thriving and sharing.
_____________________________________
From Cindy Bottasso:
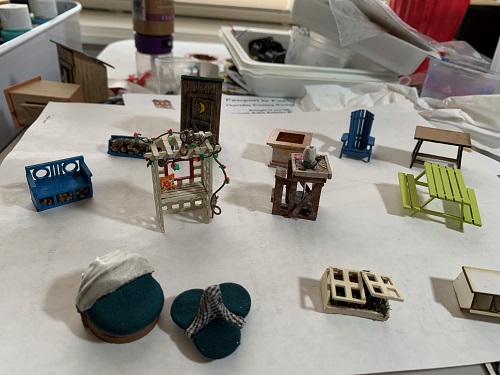
My laser cutter that I was so frightened would become an expensive doorstop has changed minis for me forever. Now I look at a picture of a real object and can create it most times. I love it!!!
_____________________________________
From Cheryl Polito:
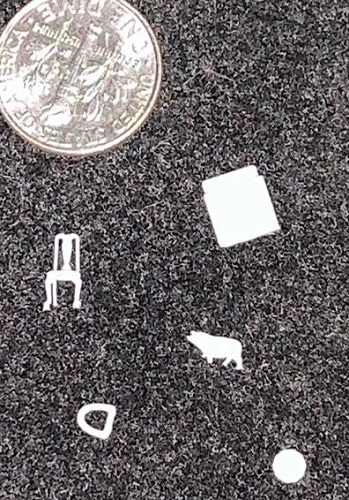
I have purchased three different 3D printers and once they are set back up I will be printing again. There are lots of things that are easier but for me I love having my printers so that I can make furniture in micro scale. I really love the detail and how fun it is to shrink my quarter scale items down to 1/144th scale. I enclosed a picture of a stove, chair, pig and toilet seat I printed in 1/144th scale.
_____________________________________
From Shannon Schafer:
I'm submitting four photos of my creations at the suggestion of the QuarterConnection group of which I'm a member. I'm using a Cricut Maker that I got for Christmas, 2021. The Cricut is helping me create a quarter scale museum from a kit I've bashed, Michelle's Miniatures The Mulberry, and Art Deco Structure, Quarter Scale. I'm going for a Mackintosh style theme.
It's quite a journey learning the Cricut. I'm using it to create structures, cut vintage HO wall board to match the museum's walls, and make furniture, exhibits and three layer wallpaper. I think I'm finally getting the hang of it!
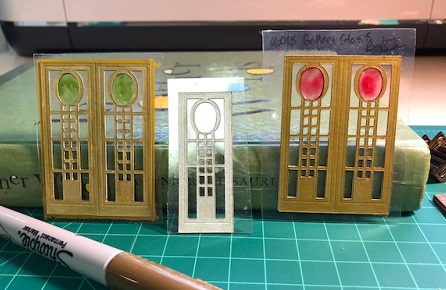
In this photo, "glass" doors were created using 2 cut layers of Cricut Printable Sticker Paper that I colored with metallic Sharpies, sandwiched together with clear acetate between them.
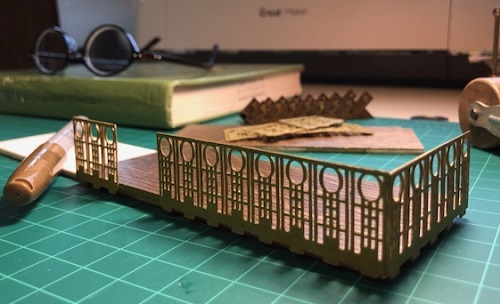
This photo is a picture of one of two balconies in the museum. The railing are created with two cut layers of light cardstock glued together and colored with a metallic gold Sharpie (the doors were created using the railing design).
This photo is the cafe of the museum, in progress. The "wallpaper" is actually three layers of cardstock made using the Cricut fine blade and the new embossing tip. It was indeed the biggest challenge so far. I made the pastry display cabinet and its matching counter with the Cricut using the sticker paper, acetate, and Cricut Kraft Board. I'm using the pastry display design to create display cabinets for exhibits, which means a lot less design work for me, just altering a bit here and there.
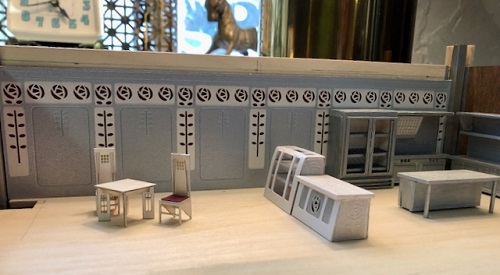
The lovely mackintosh table and chairs are from a kit by Jane Harrop (https://www.janeharrop.co.uk/), her1/48th Scale Mackintosh Style 'Salon De Luxe' Kit and the industrial kitchen is a bit of a bash of the industrial kitchen set from SeasideMiniatures on Etsy.
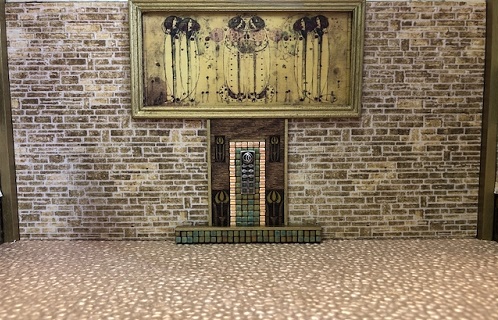
The last photo shows the back wall of the museum floor. I didn't use the Cricut for any of it but wanted to show the "wonderfulness" of the internet; the "tiles" of the feature are myuki beads I ordered from Etsy. I use the internet intensively for learning and sourcing in making my mini dreams come true.
_____________________________________
From Bev Fleming:
I'm enclosing a photo of my Xyron creative station, that I've had for probably 20 years & never used, but thanks to Evelyn G. I finally used it to run the wallpapers for several kits, as I hate to use Yes glue! This was so easy & came out beautifully & no mess (don't know why I never used it before). My advice is if you have one try it you'll love it!

_____________________________________
From Lynne Hoffman:
Technology has certainly changed the world of miniatures in the last 50 years. Computers programs help us create printables, sign up for workshops etc. (Remember getting up before dawn to wait in the workshop sign-up line at NAME conventions?) Color copiers print beautifully, laser cutters are precise, 3D printers are amazing, and LED lighting is so simple.
Email gets us quick delivery of newsletters, club meeting invites, class supply lists, and miniature show announcements.
How about online shopping? Searching for a miniature item can be done anytime from anywhere. I’d still rather buy from an artist from a show, or find that perfect piece in a brick and mortar shop, but being able to connect with miniature artists from home is the next best thing! Online classes are a wonderful option as well.
Zoom (and other platforms,) have been a lifeline for miniature clubs during this pandemic. Many clubs have even been able to connect with past members who have moved away or new members far away.
Last, but not least -- texting! My club has stayed connected between meetings via text messages. We send photos of works in progress, finished pieces, birthday greetings, and just check in with each other. Those texts certainly made the days of lockdowns happier and they continue to be a bright spot for me even now.
_____________________________________
From Mae Karoli:
When I purchased my first computer and printer/scanner/copier/fax in 2002 one of the things I insisted on was the ability to resize things using the scanner. With my current computer setup (which will need to be replaced in the next couple of years) I use Microsoft Paint to select a portion of a screen print or scanned item and resize as needed. I also use Word and Excel to resize items. Using different applications I have made totebag favors and labels for conventions and made signs and many other items for my projects. This is the poster I found on the internet for my club, Strongsville Miniature Club (Ohio), to use for totebag favors for the 2011 convention “With A Song In My Heart”.

_____________________________________
From Shirley Foisy:
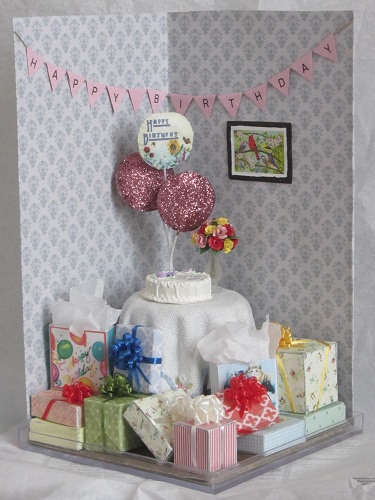
For me the greatest new technology is the printer. I love being able to copy, enlarge, or reduce so many things. In my birthday box I used free gift bag & boxes printies. I even used one to make the balloon. I also love the great punches that allow you to make flower parts in mini, which I used to make the vase of roses. I have used many of these 4 x 4 x 8 plexi boxes. They make great tiny scenes in 1" scale without taking up much room.
_____________________________________
From Rita Crawford:
To me the computer has made the biggest difference in making and collecting miniatures. With it you can design and resize printables, look up patterns and instructions, watch video demonstrations, read your miniature magazines, take online classes, shop for miniatures, stay in touch with other miniaturists by email, text, online digests and Zoom. It just keeps getting better!
_____________________________________
From Lisa Miller:
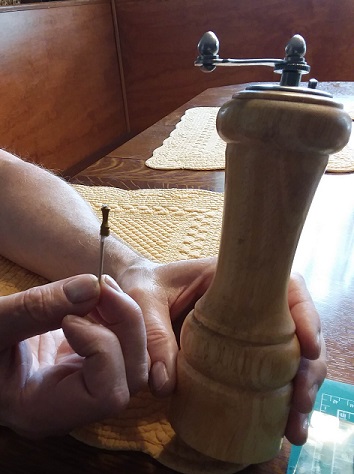
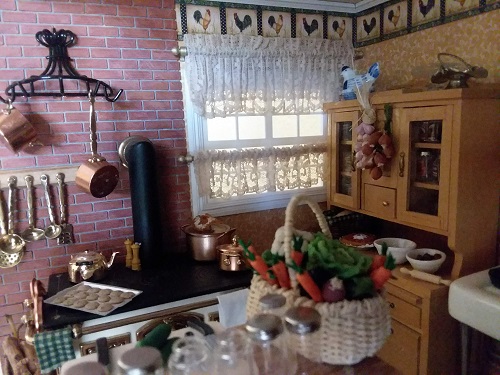
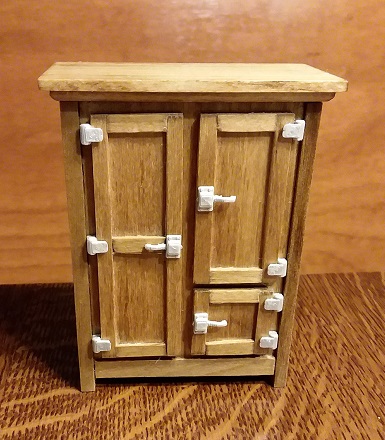
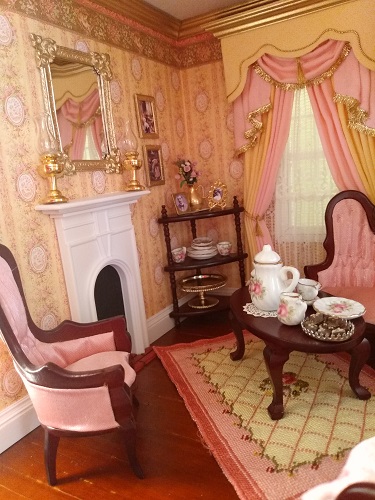
I'm lucky that my husband is very handy with his 3-D printer. He's made me several things for my room boxes including fireplaces, statues, brick, salt and pepper shakers, doors, windows, and hinges for an icebox.
_____________________________________
From Susan Skinner:
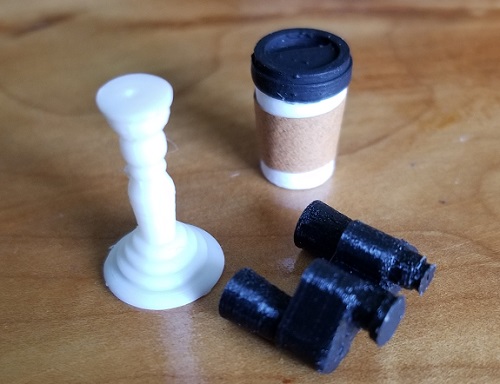
My son has a PLA 3d printer which has been wonderful for my mini projects. He has been helping me learn how to draw things on Fusion 360 which he can then print for me. This photo is just a few items I've been able to make that way.
_____________________________________
From Christiane Starks:
I started working in smaller scales some time ago. My son would observe what I was working on, and he started 3D printing jigs to help me hold onto those tiny builds - especially the 1/144 builds. The first picture is a jig that allows me to get a neat little rim around 1/4" diameter plates: I place the punched plate into the jig, run a small ball stylus around the edges and and push the finished plate up from the bottom - using a fancy paperclip. The second picture is a "cutaway jig". This jig allows me to work on a tiny build without my chubby fingers getting in the way.
_____________________________________
From Rhonda Williamson:
My biggest mini technology breakthrough came when I purchased a color printer for my home office. I used to spend hours looking through magazines and craft stores for the perfect cutouts and accessories to add to my mini scenes. Seldom finding exactly what I wanted was frustrating.
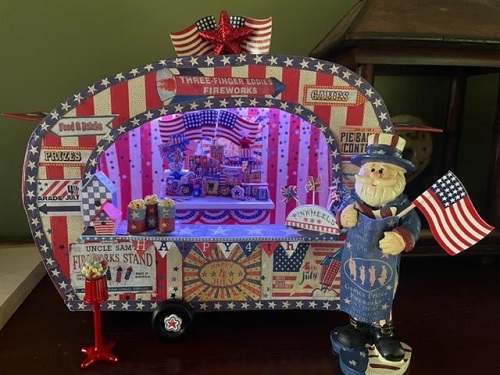
With access to the internet, graphic programs and my own color printer I can find, create, size and customize any item that I need. This is my recent 4th of July project. The trailer was created with a Cricut machine and the graphics, signs and tiny fireworks were all customized and printed on my home printer. Each member of my local NAME club, the Warren Ohio Area Miniature Club, was given a trailer kit to construct and customize. It's always fun to see what each member of WAMC has created on reveal day.
_____________________________________
From Preble McDaniel:
When I started making miniatures I had a cheap point and shoot camera, not even 35mm if I go back to the very beginning when I was a child. Even with a 35mm (still point and shoot), I had to wait for the picture to be printed and mailed back to me to know if the photo was any good. Back then I was limited to people photos and not miniatures. At least not until later when I met fellow miniaturists online and I wanted to share photos of my minis.
In 2001 when I built my first website, the photos were 35mm prints scanned to the computer. In 2002, I purchased my first digital camera. It was a giant leap for me because now I could take as many photos as I wanted and edit (crop) them. I was able to share so much easier online the projects I was making. Not only sharing, but sharing really good close up photos. I used the attached photo taken in 2003 to illustrate how to take close up photos by cropping the digital image. The bunny is 3/4 inch long but I could take a photo that would fill the screen with that wee bunny.
After my second digital camera I switched to using my cell phone. It is much easier to take a photo and upload to a computer (or the cloud). I decided to spend a bit more for a nicer phone because it would have a nicer camera. reason for my switch was the digital camera often wasn’t charged anymore when I wanted it. I haven’t gone back to a digital camera. Today having that cell phone handy is more about taking a quick snap probably of miniatures, than getting a call or text.

_____________________________________
From Jackie Browder:
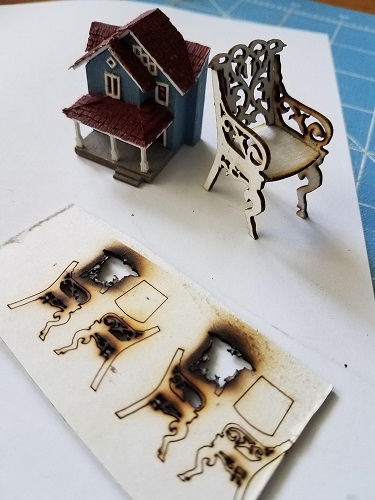
I think that technology has made the creation of 1:48 and 1:144 houses (like Debbie Young's Carmel House kit in the photo) much easier. The new availability of high tech crafting machines is probably the reason for the new popularity of smaller scales. Making such tiny details would be very difficult without 3D printers and lasers. But, I sometimes wonder if they are worth the trouble! In the photo is a prototype of my newest design, a fancy half scale chair. I tried to cut it out in quarter scale with a laser, but only got a pile of charcoal!
_____________________________________
From Carol J. Shea:
I join in quite a few swaps and this little green deer impressed me so much I had to create a scene just for it. It would be impossible without today's technology to produce such fine detailed work as this tiny deer displays. He is only 1" tall but the antlers are perfect. I only wish I knew who made him as there was no name on his container. The white pine tree is 1 1/4" tall. The display case from base to top this scene is in is only 2 3/4"H X 2 3/4"W X 1 3/4"D so I would think that makes the deer 1/144 scale.
_____________________________________
From Trish Billard:
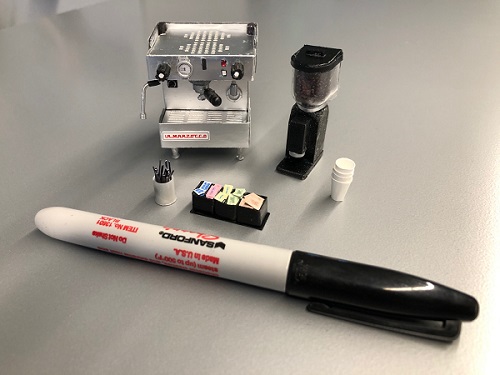
My vote goes for the Cricut cutting machine. I have been using computers, and specifically Corel Draw, plus my printer/scanner for years now to scan, shrink, and print items for my minis. In 2019, I got a Cricut Maker, and I figured I’d see how small it could really cut. I was so excited: “A ROBOT XACTO knife!”
Something that could cut square, and could repeat things consistently. I probably wouldn’t have attempted making this espresso machine and all paper coffee cups without my new toy. Eventually I made something like 60 coffee cups to stack up next to the machine. I couldn’t imagine cutting all those drain vents accurately without slipping and messing it up bunches of times!
_____________________________________
From Julie Stevens:
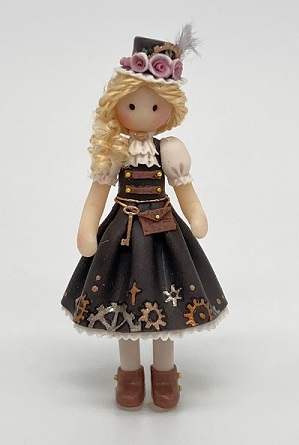
All my quarter scale dolls are handmade using polymer clay. The same is true with Annalise, but I added some of her details with technology. The gear on her hat was made using my Cricut machine, and the key hanging from her belt was made using my 3d printer. It's amazing how perfect, tiny and delicate these machines can make things. It truly opens up a whole new world for details in miniatures.
_____________________________________
From Jenni Hilliard:
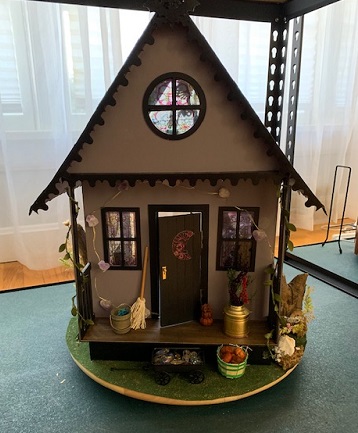
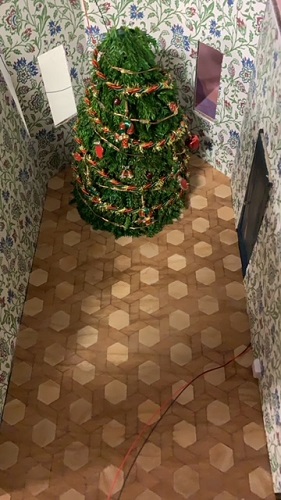
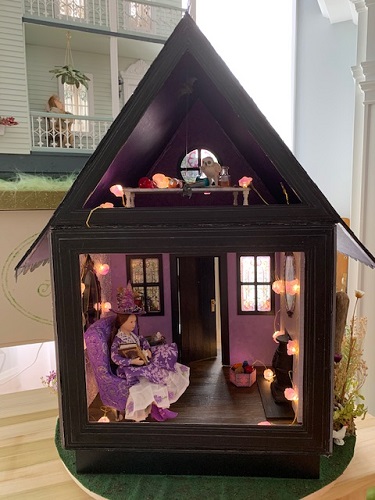
I use the Cricut machine to make so many things. Furniture, wallpaper, even actual structures! I belong to the Louisville Miniature Club. I used the Cricut and a pattern from Spellbound Miniatures to make this piece. The pattern was for the house and included the flooring, doors, windows, everything! I won second prize at the Kentucky State Fair with it. I have made countless pieces of furniture on my own and from patterns. It’s great for flooring, too.
_____________________________________
From Danny Johnson:
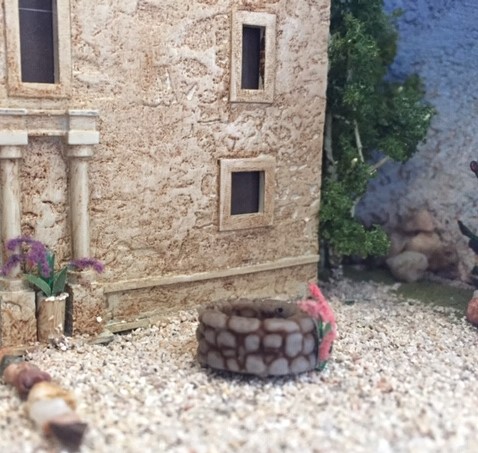
The Alamo was printed on a resin printer, complete with texture. I have also enclosed photos of the cannon and the well as they were also printed on the resin printer. The miniature is made in a gourd (which had to be cleaned on the inside). Lighting consists of a strip of nine LED lights with batteries concealed beneath the board on which the gourd is mounted.
_____________________________________
From Marjorie Parker:
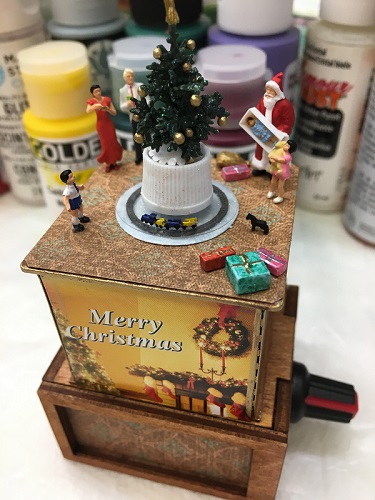
I have been absolutely fascinated with miniature lights and got my start when Evan Designs showed me how to connect a battery and switch to an LED. Thank you! But my jaw dropped when I first saw Volker Arnold’s motorized 1/144th scale Giant Ferris Wheel in his BunnyLand Amusement park. I have been able to duplicate that miniature motorization in quarter-scale and smaller Ferris Wheels, carousels, water mill wheels, and the latest is micro teeny trains (1:2000 scale). Roy Moore tells me that his miniature club motorized a 1/12th scale carousel thirty years ago - so the technology is not new, especially among the model train aficionados. I am mostly self-taught and enjoy scrounging on Amazon for my Motorization parts. So what technology does for me is help me light tiny things up and make them move!
_____________________________________
From Jennifer Lockhart:
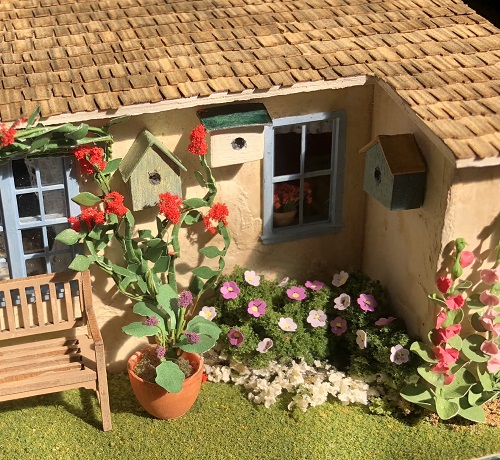
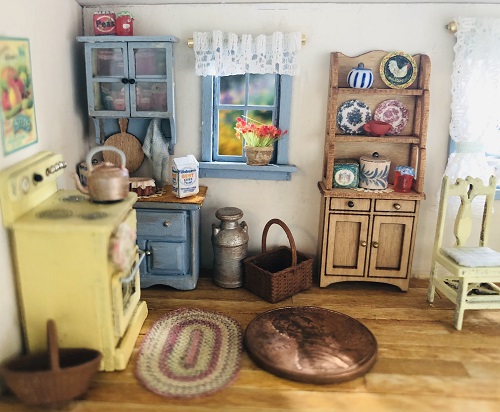
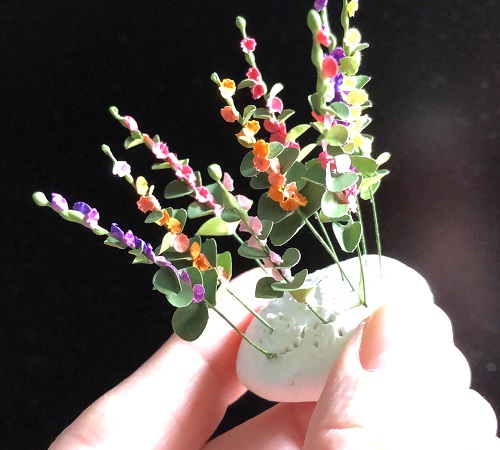
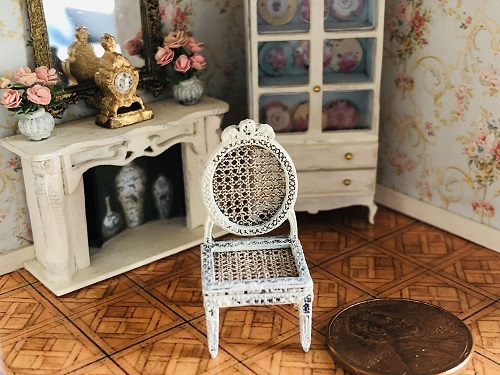
What’s easier to make now because of technology? Everything. But I think the greatest innovation is access to high quality digital cameras. Our phone cameras - with their impressive macro modes - have made is so much easier to take photos of miniatures we couldn’t get before. Remember the days before digital photos? I do. I wasn’t allowed to waste precious film on my minis - and my film camera photos never had the right focus even when I tried. Plus all those times I’d take months to finish a roll and forget what I had even taken photos of. But those days are over! We have instant access to photos, and no longer waste paper and film on them. The phone cameras have fantastic zoom features. Now I can take photos that transport me INTO a 1:48 kitchen, or a tiny sitting room - closer than I’d ever get to be with my eyes. I can take it and enlarge it even more to see all the details I missed. Or in the case of the amazing caned chair I got from Jean Day -- I can see the detailed caning up close AND share it with friends now. Making tiny flowers is so much easier when you can take photos and share with others for feedback, or see things you missed before. It’s been a huge quality improvement for crafters, but also made it so much easier to see and share miniatures from so many more people, miniature shows, and artists all over the world. And it doesn’t cost a fortune any more.
_____________________________________
From Dia Crissey-Baum:
I am one of those technically challenged people whose eyes glaze over when they start hearing about how to do even the most basic of things on my computer. I can learn, but it’s a slow process! I studied architecture in the late 80s-early 90s and while we had a class in CAD I just didn’t get it. It was all drawing by hand and cutting with X-acto knives. I have been dragged into the 21st century kicking and screaming, but I’ve picked up a few things.
I have learned how to draw things on CorelDraw. My mini business has forced me to learn how to operate the laser cutter as well, and I don’t think I’ll ever learn all of its bells and whistles (although some of them are really cool). That laser cutter really helps my perfectionist self in making things square, every time!
But I think I’ve actually gotten more use out of our laser printer. My husband had a home office for a number of years and he needed a good business printer (plus he loves his electronic toys!), so we have a Ricoh that can print in full color on up to 11x17 paper. Or construction paper. Or transparencies. Or decal paper. Or watercolor paper. Or envelopes (very helpful—my handwriting is worse than my typing!). And since it’s not an inkjet, the color stays on the decals when you soak them. Even when the toner says it’s low, it can go for months before I have to replace the cartridge. For minis, I can print out things really small and they still look like something, and for my kids I can print out posters or full-size sewing patterns, even if we have to tape them together.
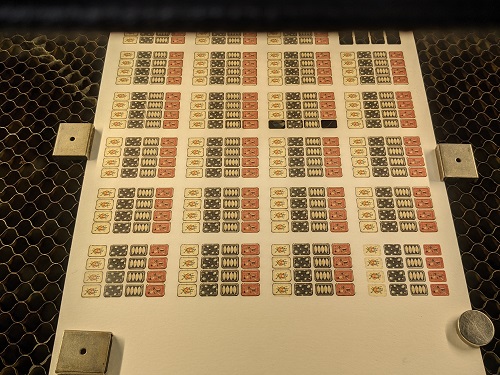
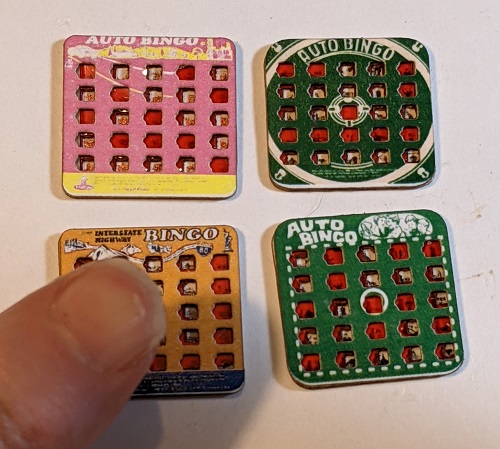
I won’t bore you with a picture of my printer, but here’s something I printed out, all set to cut out on the laser cutter. Those are quarter scale TV trays. On one day three people bought them from my shop thinking they were full-size. They must have thought they were getting an amazing deal — four trays and free shipping for $5! — so remember, friends, read the descriptions! The second image is of some mini Auto Bingo cards I did for a travel-themed swap last year. I was really happy with how they turned out!
_____________________________________
From Ruth Goodger:
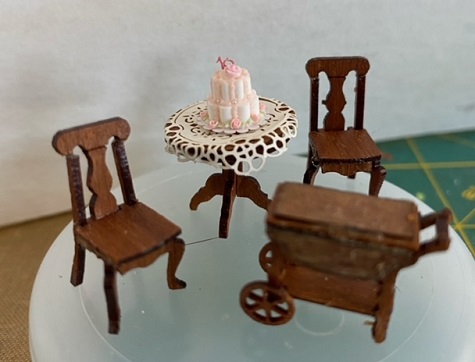
Laser technology has made delicate minis so much more possible. I enjoyed the scratch built minis of artists like Debbie Young and Karen Cary but the laser has made it so much easier for them to provide accurate scale minis once they master the tech skills. It has also presented a challenge for us doers working with delicate and tiny pieces. The look of a scene changes with laser cutting also.
_____________________________________
From Julie Jones:
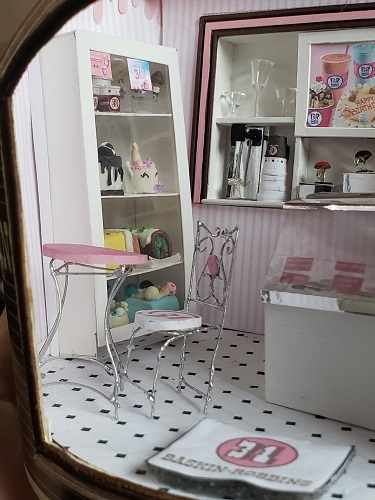
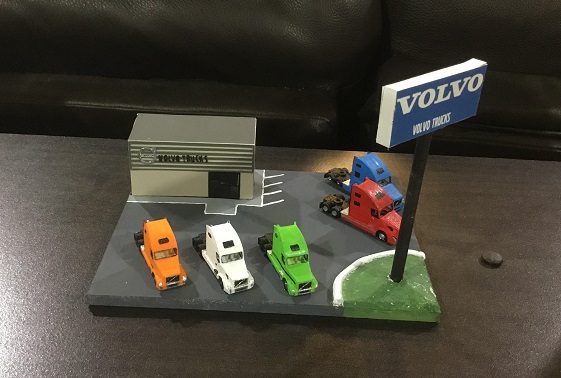
I haven’t been doing minis for too long, so I can’t say what has made them easier necessarily. I do know that I have used my printer countless times to get just the right sign or label. Of course, without the images and ideas on my computer and the internet, I would be lost -- I don’t visualize well! My family is full of creative hobbyists, so I have access to play with lasers, cnc machines, and 3D printers. I would say that without all the technology I may be much slower and certainly not as neat, but even still a majority of my crafting is done with good ole elbow grease and problem solving. In the first picture, the signs, cups, mats, wallpaper, flooring, etc … were all shrunk down and printed for my Baskin Robbins shop. In the second picture, the trucks are all the throw aways from my dad testing his 3D printer (for his model railroad). I used the Cricut to make a good bit of the building.
_____________________________________
From Natalie Maguire:
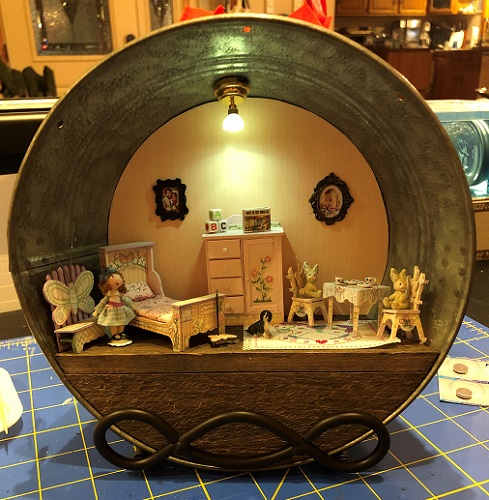
I use an app on my iPad called “Print to Size”. I love this app because it allows me to take a photo, picture, screen shot and reduce them to the size I need. I have used it often to add framed photos of people to a room box to personalize it for the recipient. It is easy to use and can be sent right to your printer or saved for later.
In the photo you can see the framed picture of the baby this was made for and the other photo is of her parents.
_____________________________________
From Tammy Witthaus:
Although it is older software, I use Paint or Word to shrink things that I have created as a craft in real life/normal size and then repaint and embellish as a miniature. Here are 2 recent examples.
_____________________________________
From Suzie Aguilar:
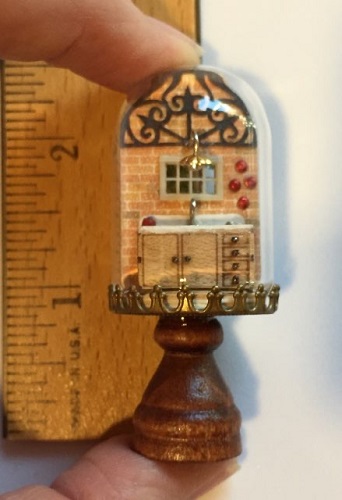
For this project, I designed and then used my Cricut Maker to cut the floor, wall, the ’wrought iron’ design over the sink, as well as the wall paper and floor paper. (Not to mention the sink was a laser cut kit from an Etsy seller.) I would have never attempted this without the Cricut!
_____________________________________
From Sharon Johnson:
What easier to make because of technology? Molds! Silicones and ceramics. We used to have to search for molds online and in stores. Now we can make our own! It’s opened up a whole new works for us.
_____________________________________
From Sally Lonn:
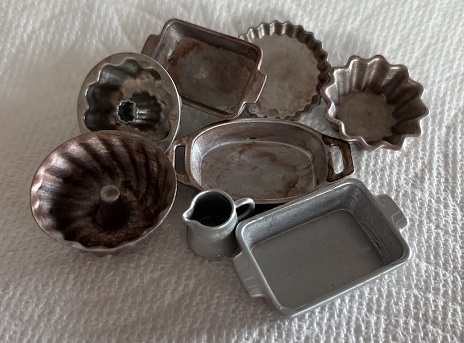
Recently I have been working on a tiny shop, Industrial, farmhouse, eclectic in nature. This wonderful dirty kitchen ware were all created with a 3-D printer from Tiny Delights. They are light as a feather!!! I am thinking of all the wonderful items created by Alician Pearce, Janet Smith and Ruth Stewart, too. I first noticed technology with laser cutting and the huge improvement in how quarter scale kits in wood fit together so beautifully. I don't think there is a limit to what we will see in the future.
_____________________________________
From Marilyn Hughes:
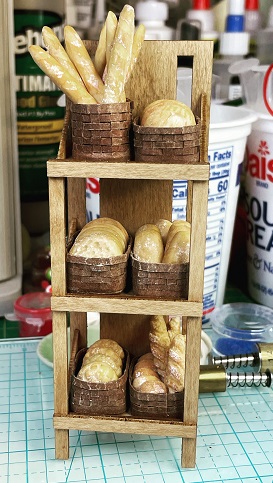
The baker’s rack was made from a laser cut kit by Dragonfly International and I cut perfectly straight lines for the paper “wicker” baskets and the wood bottoms (not seen) using my Cricut Maker. The bread was handmade my me from Stewart Dollhouse Creations molds.
_____________________________________
From Margaret Gordus:
Computers made miniature Photography much easier. The internet makes it easier to find items to copy & reduce to scale. LED lighting makes electricity much easier.
_____________________________________
From Barbara Thornton-Hill:
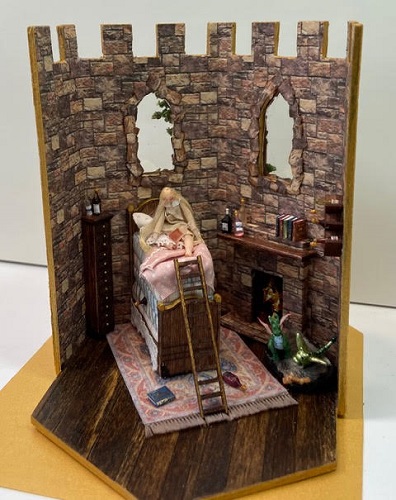
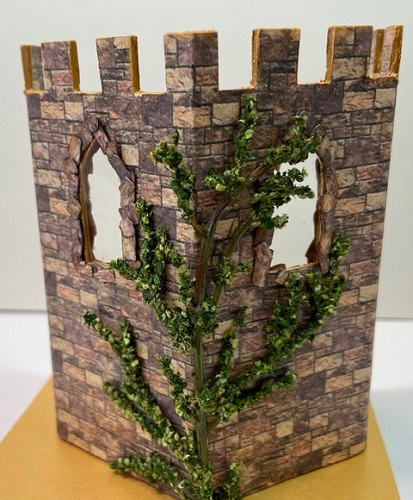
This is from the TNP from the recent Online Houseparty. The 1:48" Castle room kit is cut from a laser cutter, the wallpaper and bedding/mattresses is printed with a computer on fabric and the wallpaper was as well. The doll is from Cat Wingler (low tech but really cute) and the wine bottles all over the room are made with a 3D Printer. Wood furniture and wine rack were also done with laser cutter. This kit would have been much harder to produce before the technology of today.
_____________________________________
From Evelyn Gumina:
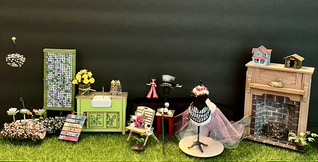
The new technology that has helped me greatly has been the computer itself. The ability to search websites on ones laptop, desktop, iPad, iPhone or any other android device, eg., NAME, YouTube, Pinterest, Facebook, and the ability to buy miniatures online is fantastic. BUT for me, the greatest of all has been ‘Zoom’ and then ‘Create.Miniatures.org'. Since the onset of the pandemic the ‘Zoom’ technology, has helped me communicate with other like minded people via Mini Cyber Club and Quarter Connection. I have taken many workshops through ‘Create.Miniatures.org'. To actually see a Workshop lesson at a closer view rather than in person, standing/hovering over the instructor hoping to be able to see what they are teaching.
The picture below reflects a few of the many Workshops I have participated in through Create.Miniature.org.
_____________________________________
From Julie Stuckmeyer:
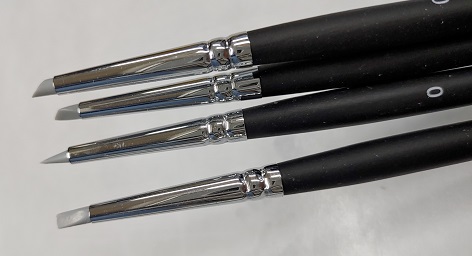
I think my favorite technology advance right now is these silicone tipped paint brushes. They work fantastic for tiny detailed painting, applying glue, and so much more. They don't work as well for painting large surfaces but they sure do clean up nicely!
_____________________________________
From Mary Johnson:
My favorite "high tech" equipment is the new coin cell batter lighting system for miniatures! I can finally light scenes without agonizing over grommets and teeny nails and fiddly messes of the old tape wire lighting (which never, ever worked for me!)
_____________________________________
From Debbie Colombo:
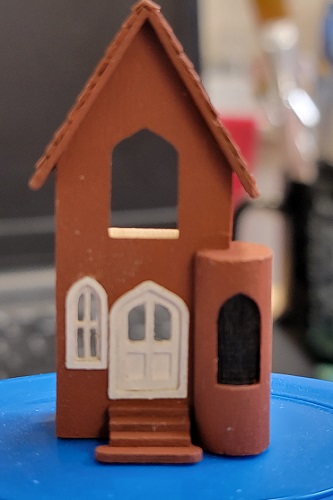
This is a kit from Debbie Young. Imagine if we had to carve out that little window by hand?? Or cut those doors and windows?
_____________________________________
From Becky Maganuco:
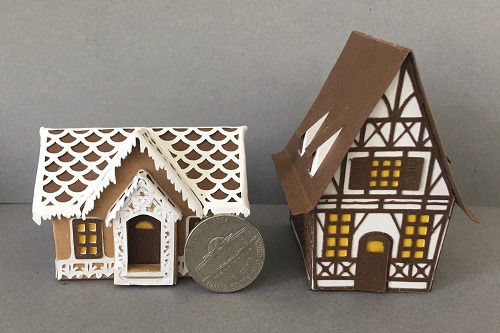
When I bought a Cricut Explore in early 2020, my first thought was to use it for miniature projects. I guess you could call it the 'poor' miniaturist's laser! I found an SVG of a project I could downsize and was off to the races. Some of you may recognize the project. It was offered as a NAME roundtable in 2020. Not knowing the technology that well, I found I had to change out the cutting needles and mats quite often to be sure the details were cut precisely. I had a few grayer hairs after that project, but enjoyed the challenge!
_____________________________________
From Cat Wingler:
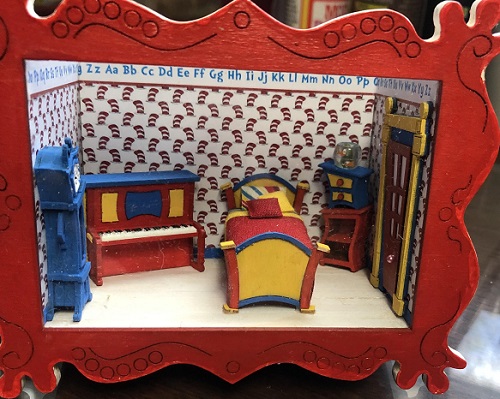
I have had this little kit for a while and now I’m wondering why I waited so long to put it together. It is a laser cut room box and furniture in quarter inch scale by Debbie Young. I added a fish bowl on the chest and I left some room inside to add a couple of characters, maybe thing one and thing two? And of course, the cat in the hat will be standing outside.
_____________________________________
From Angelika Oeckl:
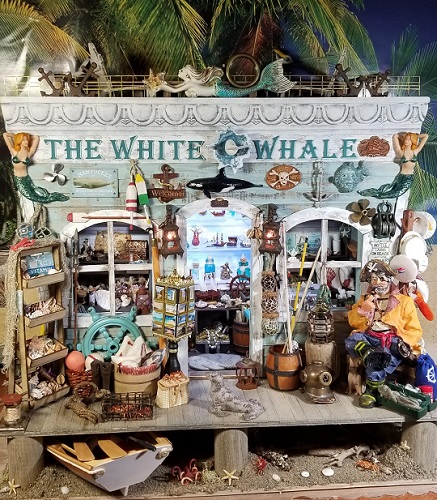
I have a Formlabs 2 resin printer at work and I am using it excessively for minis whenever I can. In this small scale, I am running into issues often and have had my share of misprints. Some items are getting too thin when you reduce them in size. I especially failed printing an assortment of designer coffee cups for my future coffee shop. The all were too thin. But I was able to make plenty of items for the "Come Fly With Me" Houseparty center piece. About 75% of this project is 3d printed not counting the structure itself. Some is scanned and resized to mini scale, some is from Thingiverse and some are designed by my creative and talented employee James who I am working hard on to bring him into the miniature world. He really enjoys the challenges of technology and computer design. I think I am pretty good in 2d design and was for a long time focusing on paper engineering, but I have not learned 3d design yet.
Unfortunately the printer has to be used at least sometimes for work and a laser 3d printer is really slow and takes several hours to put out a print. But the opportunities between a laser cutter and a 3d printer opened a whole new world for me. The amount of detail I can now produce is absolutely amazing to me. Currently I am working on a Diagon Alley book nook and I 3d printed tiny accessories for the shop displays like stacks of books, wands stands with wands, and quidditch supplies. I also printed Harry, Hermione and Ron. Painting the faces was quite a challenge in that small scale but (I guess I am bragging now) I also have a 20x microscope to work on these fine paint jobs. As a dental technician, I have many valuable tools on hand.
For the new 3d Printer user who need files to print, check out Yeggi.com. This is always my first go to site to find things. Yeggi is like Google for 3d print files. It will send you to different 3d file sites, but some of them are free and some cost a fee to download the file. My favorite of these sites is Thingiverse.com. Their files are free to download. The hard part of 3d printing in miniature are the supports. You need them to be able to print layer by layer and keep the project supported. If you skimp on the supports, you get a failed print. My Formlabs creates the supports in its own software, so I don't know how to do this with other printers. Some very filigreed items need a million supports and cutting them off after the print is done is sometimes very hard. I have ruined a lot of items because you can not find the actual print part in the forest of support pegs. I cut off the wrong parts more than once. The post processing of resin prints is kind of messy too. After your resin print is done. the surface of the print is covered in liquid resin that is not cured. You need to wash that off. The prints have to be washed in 99% Isopropyl alcohol. It is smelly and needs ventilation. When I had the printer at home, I did the washing in my laundry room. Once the uncured resin is washed off, you need to post cure it in a special light chamber to harden and fully cure the resin. For my clear resin from Formlabs, I do not cure it because the clear resin turns slightly yellow. I dry it at room temperature. Once dry, it actually is hard enough to work with. I assume it works well, because it is clear and light goes through deep enough. In the process of washing and curing, you WILL encounter spilling and in no time the work area gets sticky. Keep that in mind when you set it up and be diligent cleaning up after a round of washing and curing or your table and floor will be a gross, sticky mess. I am talking from experience here!
_____________________________________
From Jackie Williams:
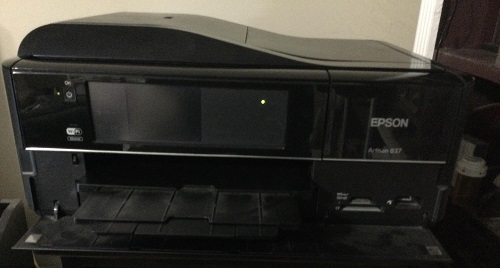
This Epson Printer and the ones that preceded it for me are the great helpers with my miniatures. This wonderful copier printer has helped me have graphics for many of my kits and my own creations. It has printed on cloth for clothes for mini people and printed on fuzzy paper for printed rugs. I always make a copy of graphics of wallpapers when I purchase a kit in case I manage to ruin what was supplied with kit and need a replacement. I love the Epson printers and I have, also, owned a printer with every computer I have ever had the opportunity to possess. I highly recommend owning one.
_____________________________________
From Vicki Scidmore:
What is easier now with technology? Kits! Especially smaller scale. I remember hand-written instructions with hand cut pieces that needed sanding and shaping. With laser technology the tiniest houses and furniture can be made that fit together every time. And 3D printing makes all kinds of different shaped things available. I don’t use the technology myself but I sure appreciate making kits from those who do.
_____________________________________

